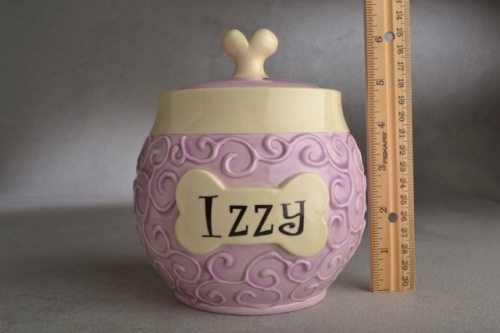
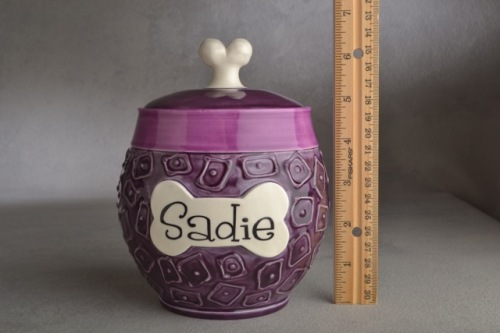
Have a customer not pleased with their jars. We think they are cute.

Posted in Uncategorized | Leave a Comment »
After rigging the Collins Coping Foot onto our Black and Decker D style jig saw to cut the crown for our bedroom we needed to find a better saw. 
On the B/D it was too far back and not very secure. You can see on the foot where the blade had come in contact with the metal after shifting during cutting.
We picked up a Dewalt DW317k and after removing the blade guard it’s perfect


On to the living room we go.
Posted in Uncategorized | Leave a Comment »
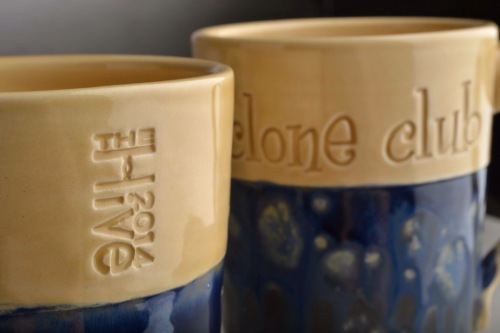
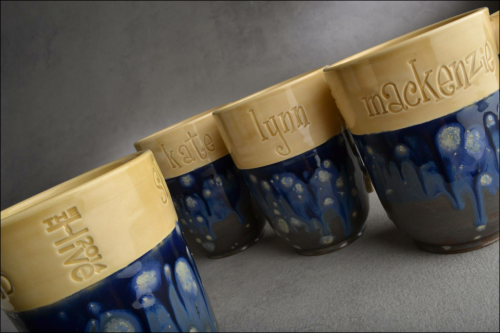
Welcome to the club. Normally the first rule of clone club is not to tell anyone about clone club but this is just too cool not to share.
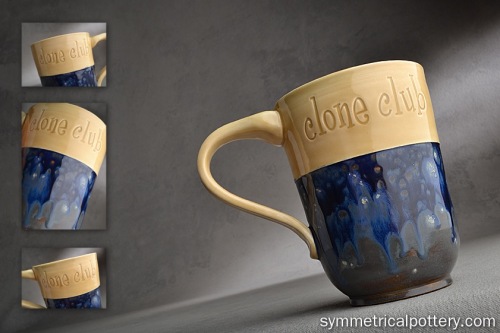
We made a clone club mug for ourselves and shared photos on facebook and got some other fans want to order their own mug. So we contacted Graeme Manson and John Fawcett over Twitter to inquire about selling them and got this response.


We have since sold a few to other members of clone club but the coolest thing was an email from Graeme asking to order 11 for all the writers on the show.
They posted this kick ass pic on Twitter.

That pic so makes me smile.
Posted in Uncategorized | Leave a Comment »
Solutions to some of our problems can be almost comical. Our butter dishes tend to bow out in the middle from the friction of the contact with the table. Elevating them the sometimes warp. Bring on the pencils and clay bag rubber bands.

Posted in Uncategorized | 4 Comments »
Posted in Uncategorized | Leave a Comment »
This is our Shimpo NVS-07 De-Airing Mixing Pugmill Lorraine.
We needed to switch from earthenware to B-Mix 5 so it was time to clean it out for the change. We pugged the 50 odd pounds that was in the machine and got ready to clean.
This is what the machine looks like after use.

Close up of the inside.

We used a hard plastic squeegee to get the bulk of the soft clay out.

After just a bit of scrapping.

You then unbolt the nozzle. Held on by 4 bolts. There’s a lot of clay left in the nozzle that you need to get out.

Then you have to clean the clay off the screw auger.

The screw auger is held on by one bolt.

Remove the bolt then pull out the screw auger. Scrape the rest of the clay off and we used a chop stick to ream out all the holes in the paddles.

Once the auger is out of the machine scraping the inside of the pugmill is very easy.

Then using a wet sponge wipe down the rest of the interior.
Nice thing about taking these photos is I was able to see the little bit of clay I missed.

We used a garden hose to blast clean the screw auger.

Scrap the clay from the nozzle using the plastic scraper then a wet sponge.

Then reassemble and it’s ready for more clay action.

Posted in Ceramics, Jewelry, Pottery, Tile | 7 Comments »

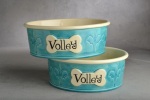
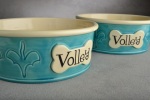
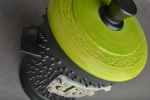
That’s Volley with a new set of Symmetrical Pottery custom dog bowls.
We were commissioned to make these through our Etsy shop. They have an added feature of a stamped pattern to match Volley’s facial markings. We drew the pattern on the computer then printed a transparency to make the UV stamp with.

We then did some tests on a block of clay then away we go.


Posted in Ceramics, Photography, Pottery | 1 Comment »
We’ve been getting requests for sealing lids on our treat jars since we started making them. On most of our jars we put the gallery on the jar but we recently came up with a rubber band style seal that would work with the gallery on the lid. Just have to throw three lids for the jar and dry trim to get just the right fit on the best lid until we get better at this style lid.

The gallery on the lid gets a wide groove dry trimmed in it to create a lip so the rubber band wont slip off.
-

- Gallery on lid has a lip to prevent the rubber band from slipping off.
Posted in Ceramics, Photography, Pottery | Leave a Comment »
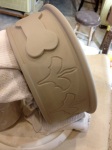
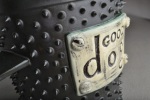
A new incarnation of one of Angi’s designs. We have made sheet metal mugs and lidded jars, now a customer that saw those asked for a set of sheet metal dog bowls. Next up stoneware ramekins.


Posted in Ceramics, Photography, Pottery | Leave a Comment »
Find It Here
Clik Image To Visit Our Etsy Store

Become A Fan On Facebook
-

Our Websites
What's shaken
-
The Latest
Most Viewed Posts
Blog Stats
- 230,162 hits
